
For homeowners contemplating a flooring renovation, the sight of old, tired, or simply unwanted ceramic or stone tile can present a dilemma. The traditional solution demolition is messy, time-consuming, costly, and disruptive, often leading renovators to ask the critical question: is it possible to bypass the jackhammer and install wood directly over the existing tile?
The short answer, embraced by experienced contractors and flooring experts, is often: Yes, but with significant caveats.
Installing wood over tile is a technical process that, when done correctly, can save considerable time and money on labor and debris removal. However, it is not a decision to be taken lightly. It requires meticulous preparation, the right choice of wood product, and a deep understanding of the subfloor dynamics. Companies like MK Professional Services specialize in navigating these complex flooring challenges, providing the expertise required to ensure a beautiful, stable, and long-lasting finished floor. This guide will provide a detailed technical breakdown, exploring the required conditions, the installation methods, and the crucial factors that determine the success of this challenging, yet rewarding, renovation technique.
The Compatibility Question—Choosing the Right Wood Flooring
Not all wood flooring is created equal, especially when it comes to overlaying a hard surface like tile. The method of attachment is the primary factor dictating what is possible over an existing ceramic or porcelain base.
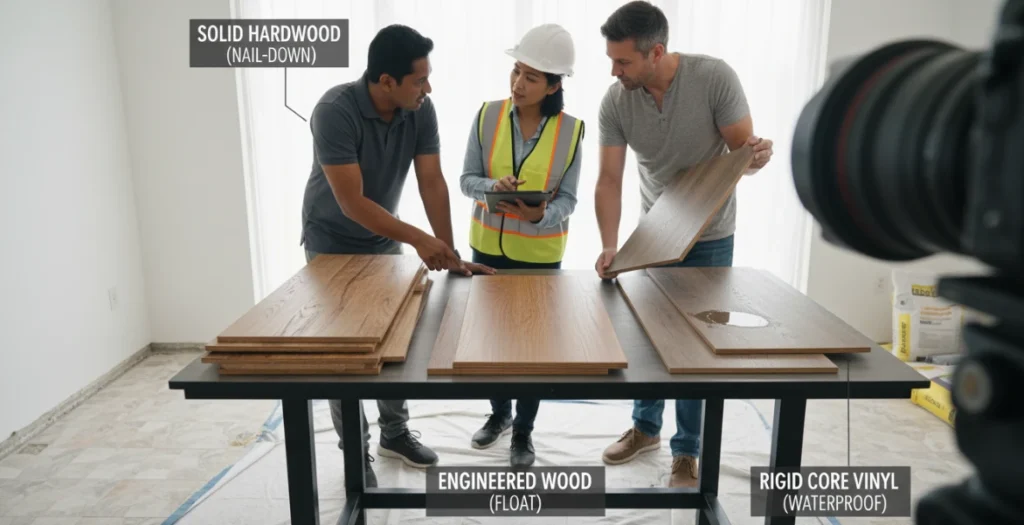
1. Solid Hardwood (The Impractical Choice)
Solid hardwood is traditionally installed by nailing or stapling the planks directly into a wood subfloor. Since tile is a rock-hard, non-porous surface, this method is rendered impossible. Attempting to install solid hardwood on top of tile would require drilling and screwing into every joist through the tile and mortar, a process that is prohibitively difficult, time-consuming, and structurally unsound due to the fragile nature of the tile under stress.
2. The Ideal Solution: Engineered and Laminate Flooring
The most suitable materials for laying wood over tile are floating floor systems—specifically, engineered hardwood and laminate.
- Engineered Wood: These planks are constructed with a plywood or high-density fiberboard (HDF) core, topped with a thin veneer of real wood. They are designed to “float” over a subfloor, meaning they interlock via a click-and-lock system and are not physically attached to the substrate. The stability of the engineered core allows it to manage slight imperfections better than solid wood, making it the preferred high-end solution for a wood-over-tile project.
- Laminate Flooring: Similar to engineered wood in its floating installation, laminate uses a photographic layer under a durable wear layer. It is the most cost-effective and structurally forgiving option for this type of overlay, as it relies entirely on the interlocking system and the underlayment for stability.
3. Rigid Core Vinyl (The Excellent Alternative)
While technically not “wood,” high-quality Luxury Vinyl Tile (LVT) or Luxury Vinyl Plank (LVP)—especially those with a rigid stone-plastic composite (SPC) core—are often chosen for their hyper-realistic wood looks and superior water resistance. These are floating floors that are exceptionally stable and often thin, minimizing the height increase. Their durability and imperviousness to moisture make them an excellent choice when the original tile floor is in an area prone to humidity.
The Absolute Non-Negotiable Prerequisites
The success of any wood over tile installation hinges not on the new wood, but entirely on the condition of the existing tile floor. Unlike installing over a plywood subfloor, the tile layer introduces several unique complications that must be addressed before the new planks are even unboxed.
1. Subfloor Stability and Integrity
The existing tile must be sound, without exception. This means:
- No Cracked or Loose Tiles: Any tile that is cracked, loose, or sounds hollow must be removed. The void must then be filled with a stable patch material or mortar and allowed to cure perfectly flush with the surrounding tiles. A failing tile beneath a new wood floor will guarantee failure of the wood planking above it, leading to squeaks, dips, and eventual breakage of the locking mechanism.
- No Failing Grout: While minor grout lines are manageable, excessive crumbling or missing grout should be repaired to ensure the subfloor is as contiguous as possible.
2. Achieving Perfect Flatness (The 3mm Rule)
This is the most critical technical step. Floating floors are extremely sensitive to elevation changes. Most manufacturers specify that the subfloor must be flat to within 1/8 inch over a 10-foot span (approximately 3 millimeters over 3 meters).
- The Grout Line Issue: Standard tile installations feature dips at the grout lines. While these are often minor, they can create a washboard effect that will telegraph through the finished wood floor, causing the locking mechanism to flex and fail over time.
- Leveling Compound: Achieving this flatness often requires applying a self-leveling compound (SLC) over the entire tile surface. SLC flows like a liquid to fill in the grout lines, minor dips, and low spots, creating a smooth, monolithic surface. This process adds significant labor time and material tile installation cost to the project, but it is indispensable for longevity.
3. Height Increase Consideration
Installing new flooring over old flooring, especially tile and mortar, will inevitably raise the floor height.
- Transition Points: This new height can create tripping hazards at doorways and will require specialized transition strips where the new wood meets other flooring (e.g., carpet, different tile).
- Doors and Casings: The increased height can interfere with the swing of existing doors (closets, entry doors) and may require doors to be trimmed down and door casings to be undercut.
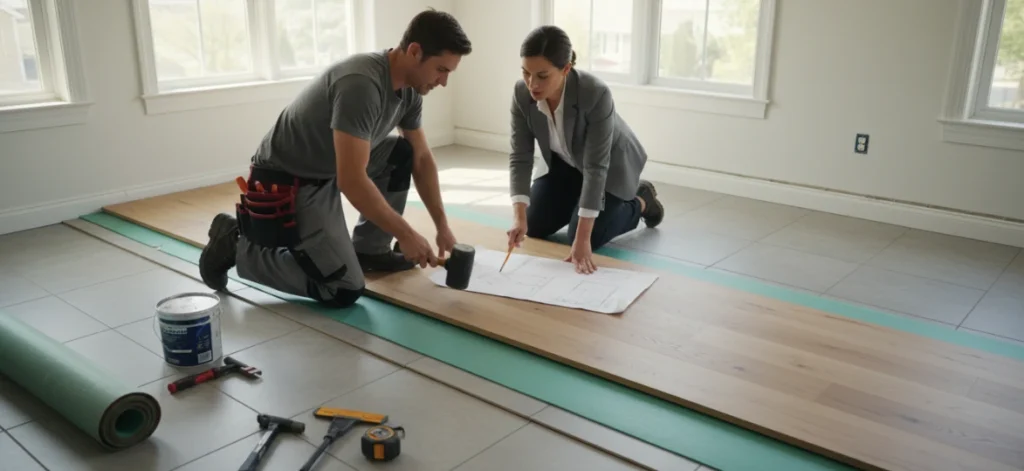
Installation Methods and Moisture Management
Once the tile is sound and perfectly level, the installation of the floating wood floor can begin, utilizing crucial moisture control layers.
1. The Underlayment Requirement
A high-quality underlayment is essential when installing wood over tile. The underlayment serves three primary functions:
- Moisture Barrier: The tile and its mortar can hold residual moisture. A vapor barrier (often a 6-mil poly sheeting or integrated into the padding) prevents any moisture from migrating upward and damaging the wood core (especially important for HDF-core laminates).
- Sound Dampening: The hard tile surface can amplify footsteps and noise. The underlayment absorbs sound, creating a quieter, more solid feel underfoot.
- Minor Cushioning: It provides a slight cushion that helps the floating floor move as a single unit, protecting the click-lock system from the minor flex inherent in a floating floor.
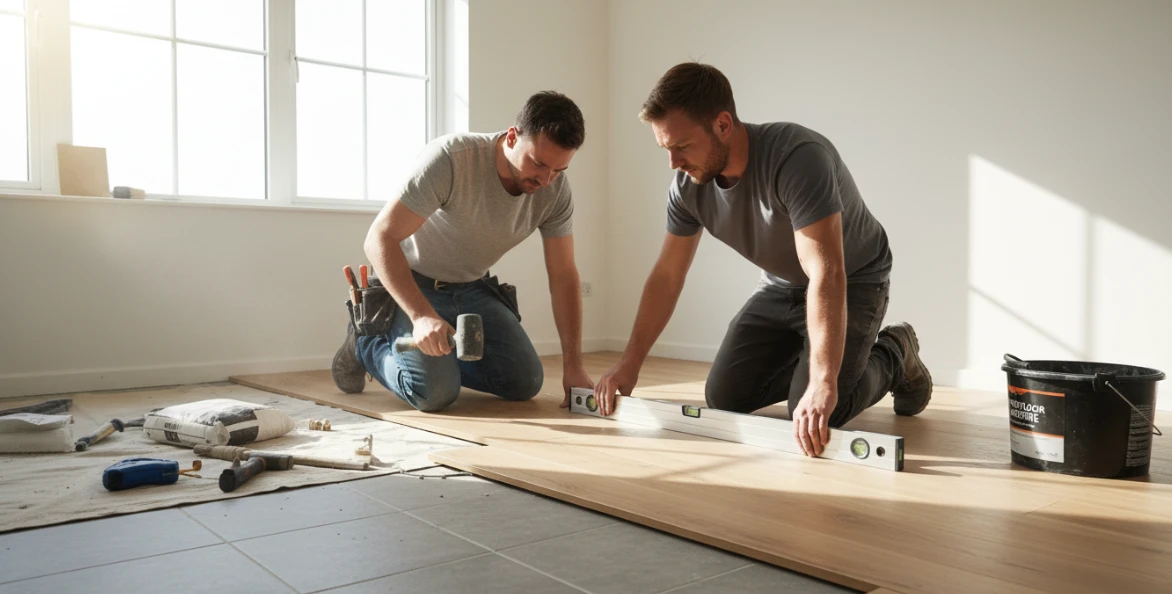
2. The Floating Installation Process
The click-and-lock system is ideal because it does not require adhesive, which would struggle to bond permanently to a slick, non-porous ceramic or porcelain surface. The planks are simply interlocked, leaving a small expansion gap (typically 1/4 inch to 1/2 inch) around the entire perimeter of the room to allow the wood to expand and contract with humidity changes. This perimeter gap is then concealed by new baseboards or quarter-round moulding.
3. Why Glue-Down is Generally Not Recommended
While some engineered woods are meant to be glue-down, attempting this over existing tile is high-risk. Standard construction adhesive requires a porous surface (like wood or concrete) to properly soak in and cure. Tile, being non-porous, creates a weak bond where the adhesive sits on top of the tile. This can lead to bond failure, planks popping up, and a costly repair. For this reason, professional closet remodeling contractors and floor installers almost universally recommend the floating method for wood over tile.
The Specific Challenges of Wet Areas
The complexity of the wood-over-tile decision escalates dramatically when considering moisture-prone areas like utility rooms, full bathrooms, and shower areas.
1. Wood in the Bathroom (The Risk)
For standard bathroom tile installation areas—the main floor of a powder room or small full bath—floating engineered wood or high-quality laminate is technically possible if the previous tile floor is in perfect shape. However, any water event (overflowing toilet, leaky sink) is much more destructive to wood than to tile. The water will inevitably seep into the expansion gaps and attack the core of the wood flooring.
For homeowners determined to have a wood look in a damp area, the recommendation shifts heavily toward 100% waterproof alternatives like Rigid Core LVP or LVT. This material offers the aesthetic of wood without the vulnerability to moisture, making it a far superior choice for a long-term bathroom tile installation solution.
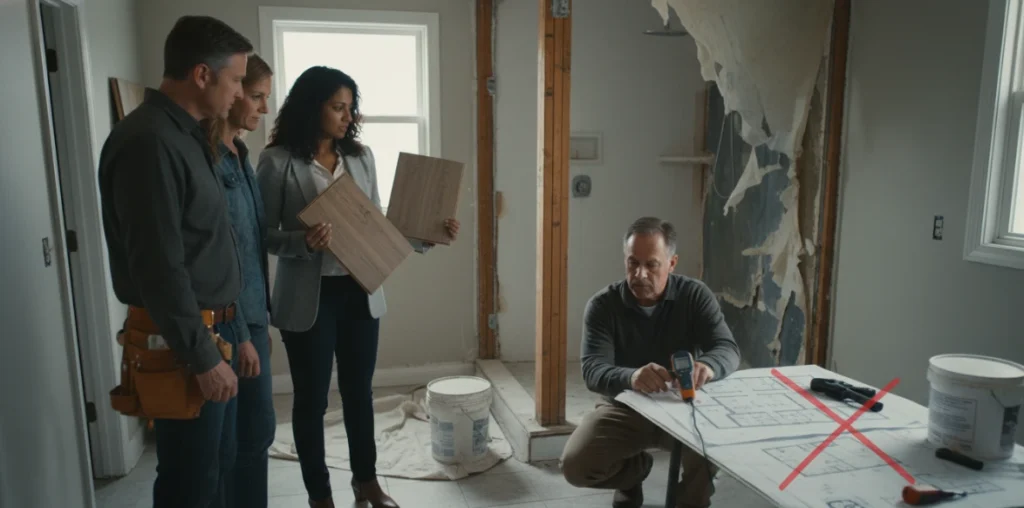
2. The Shower Dilemma
The idea of installing true wood over existing shower tile installation is practically a non-starter and is strongly discouraged by all professional building codes.
- Waterproofing Barrier: Shower floors and walls require a continuous, monolithic waterproofing membrane beneath the tile and mortar bed. True wood flooring (even engineered) cannot withstand the constant water exposure. It would swell, warp, and fail within weeks.
- The Tile Solution: In shower areas, if the existing tile is failing, the only correct and safe process is full demolition back to the wall studs/subfloor. This allows closet remodeling contractors or custom closet builders who specialize in shower tile installation to inspect the moisture barrier and rebuild the shower base with a new, continuous waterproof liner and fresh tile installation. Attempting an overlay in a shower is a recipe for catastrophic moisture damage.
Cost-Benefit Analysis: Removal vs. Overlay
The primary motivation for overlaying wood over existing tile is to save money and time on demolition. However, the savings are often mitigated by the necessary preparations. Understanding the full financial picture is key to making the right choice, which is why consulting with experts like those at MK Professional Services is essential for a detailed quote.
| Factor | Tile Removal & New Subfloor Prep | Wood Over Existing Tile Prep |
| Demolition | High Labor Cost, High Debris Removal Cost, High Mess/Dust | Low Cost (Only spot removal of bad tiles), Low Mess |
| Subfloor Prep | Requires professional cleaning, patching, and potentially new backer board/plywood installation. | Requires extensive application of costly Self-Leveling Compound (SLC) and multiple curing periods. |
| Material Cost | Tile installation cost is generally higher due to mortar, grout, and tile itself. | Generally lower material cost for floating wood/laminate planks. |
| Timeline | Longer (Demolition + Subfloor Drying + Installation) | Shorter (Prep/Leveling + Installation) |
| Height | Stays relatively consistent with original floor height. | Floor height increases, requiring door/casing adjustments. |
The hidden cost of the wood over tile method is the leveling compound and the underlayment, which can significantly drive up the installation cost. When this is factored in, the difference between the tile installation cost and the wood overlay cost is often much smaller than anticipated. In many cases, especially if the existing tile is particularly uneven, full removal provides a cleaner, more stable, and less compromised starting point.
Comparison of Wood Look Options Over Existing Tile
When opting for a wood over tile overlay, the choice of the floating material is critical for balancing aesthetics, cost, and moisture resistance.
| Flooring Type | Thickness/Height Increase | Best Feature | Water Resistance | Overall Cost Level |
| Engineered Wood | High (5/16″ – 1/2″) | Real wood veneer, high aesthetic value. | Moderate (Core susceptible to water damage). | High |
| Laminate | Low to Moderate (5/16″ – 7/16″) | Most cost-effective, durable wear layer. | Low (HDF core swells if exposed to standing water). | Low |
| Rigid Core LVP (SPC) | Very Low (3/16″ – 1/4″) | 100% waterproof, excellent for bathroom tile installation areas. | Exceptional (100% waterproof, won’t swell). | Medium |
Conclusion: Making the Final Decision
Can you install wood over tile? Technically, yes, provided you choose a floating floor (engineered wood, laminate, or LVP) and the existing tile subfloor is flawless, stable, and perfectly leveled. This process transforms what appears to be a simple installation into a highly technical preparation job.
For homeowners, the key takeaway is that the biggest potential failure point is not the new wood, but the old tile. Any lack of stability, any minor crack, or any subtle unevenness will ultimately lead to a failed installation, making the initial time and cost savings irrelevant when faced with the expense of a complete redo.
To ensure your renovation is built on a solid foundation and executed with the highest level of craftsmanship, it is vital to consult with experienced custom closet builders and flooring professionals. The team at MK Professional Services offers tailored advice and expert custom closet solutions for your flooring and renovation projects, guiding you on whether an overlay is genuinely feasible or if a more permanent, demolition-based solution is warranted. To discuss your project, evaluate your existing tile, and get a professional opinion on the best wood over tile approach, contact MK Professional Services today.

Leave a comment